
Overview
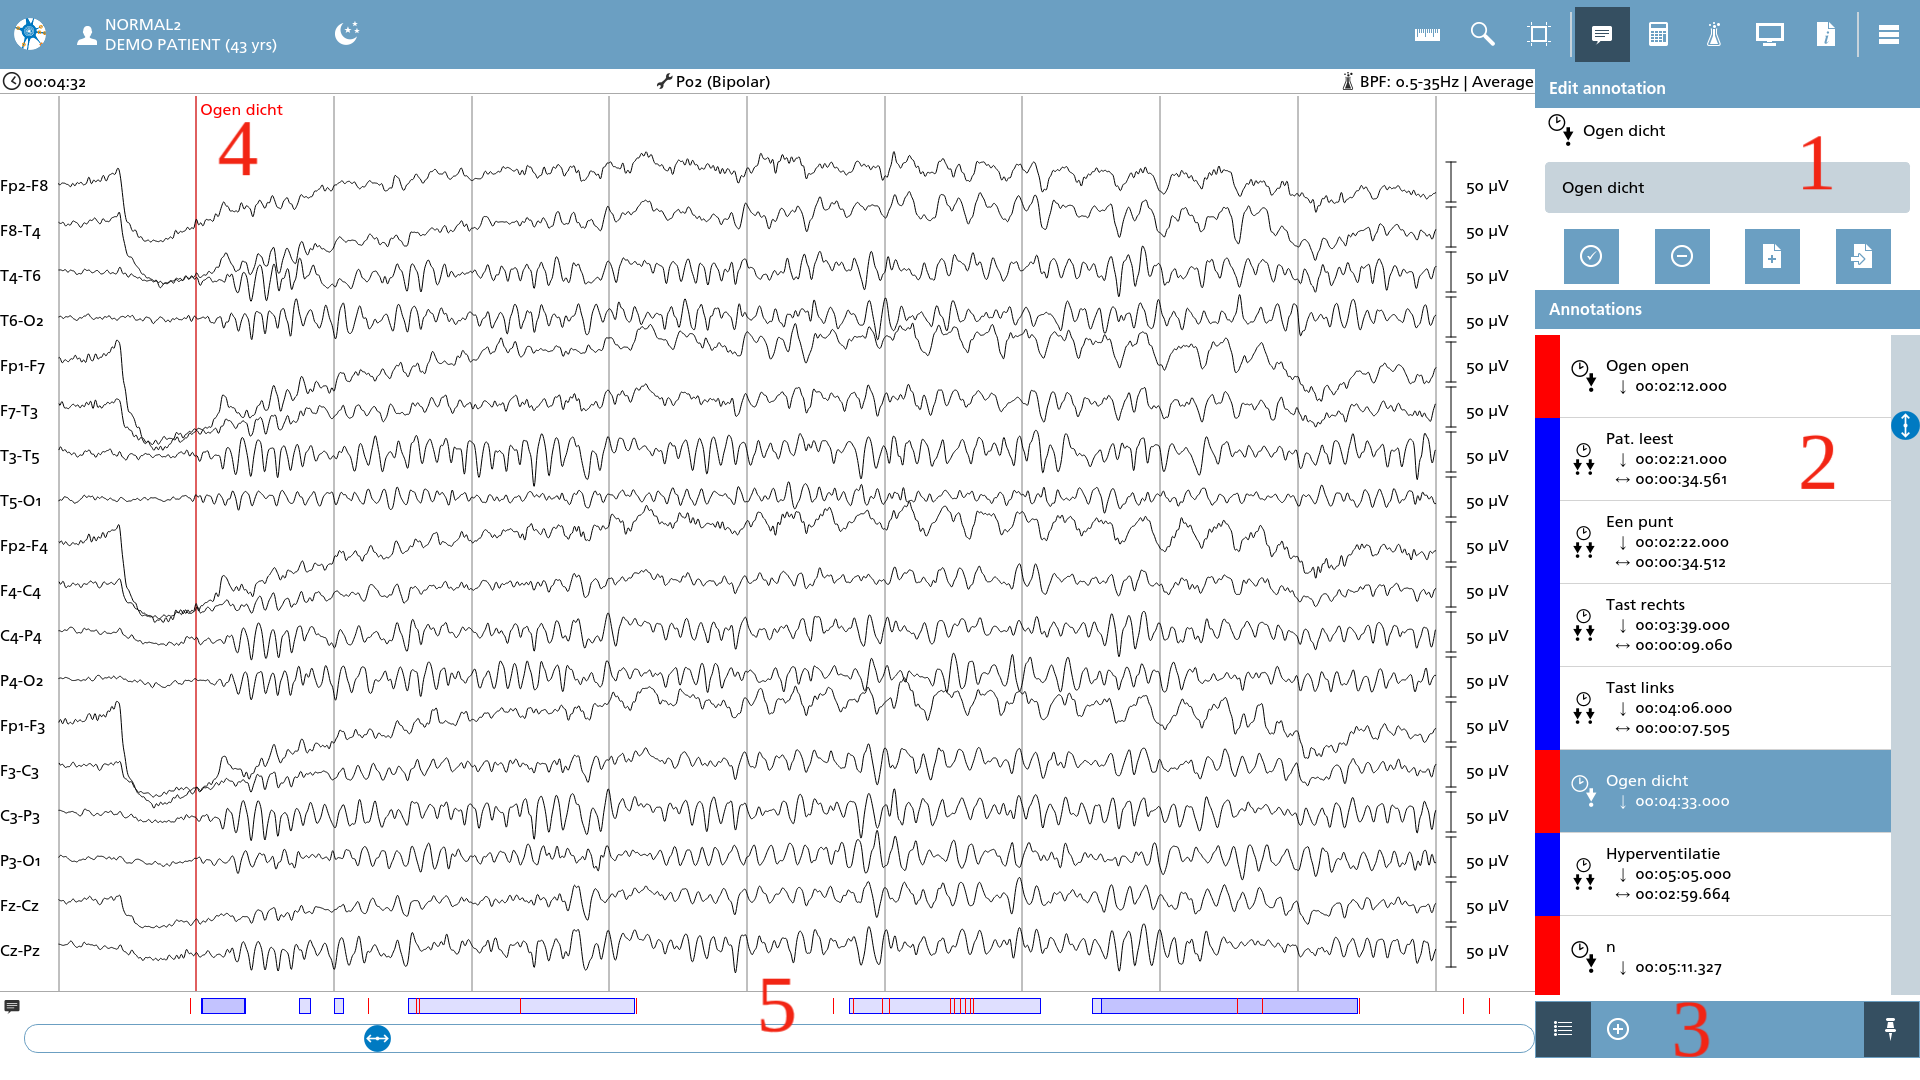
The viewer facilitates the management of annotations, applicable solely to files that possess the capability to store such annotations. If the annotation feature is unavailable, it indicates that the file in question does not support annotations.
Annotations that are stored within the measurement file are typically displayed in red when a single marker is utilized, while they appear in blue when a region is selected. Regions are defined by onsets accompanied by a specified duration. These regions can be categorized into global regions and channel regions. Channel regions denote a fixed set of channels, whereas global regions encompass all channels.
Annotations that are created or modified in this context will be preserved in the file once the measurement session is closed through the navigator, or when NeuroCenter® EEG is entirely closed.
1. Edit Annotation
The subsequent actions are available, contingent upon the selection of annotations made.
|
Icon |
Description |
|---|---|

|
Confirm Confirms the label and makes it persistent. |

|
Remove Remove the selected or new annotation. |

|
Add analysis result Add a single selected analysis result to the list of permanent annotations. |

|
Add all analysis results Add all available analysis results to the list of permanent annotations. |
Some analyses generate annotations as their output. These annotations may be incorporated into the permanent file annotations by selecting one of the actions specified above. Once these annotations are made persistent, they are treated as standard annotations, permitting editing and removal.
The annotations resulting from analyses are distinguished by different colors compared to the conventional red and blue scheme used for file annotations. When the results of the analysis are integrated as file annotations, this color distinction is no longer maintained.
2. List of annotations / preset annotations
The list of annotations enumerates all existing annotations arranged in order of their onset as they appear in the file. When an annotation is selected, the file is positioned to one second prior to the onset of the chosen annotation. The following types of annotations are included in the list:
|
Icon |
Description |
|---|---|

|
Marker Marks a single point in time. |

|
Global region Defines a region with an onset and duration, including all channels. |

|
Channel region Defines a region with an onset and duration, selecting a subset of the available channels. |
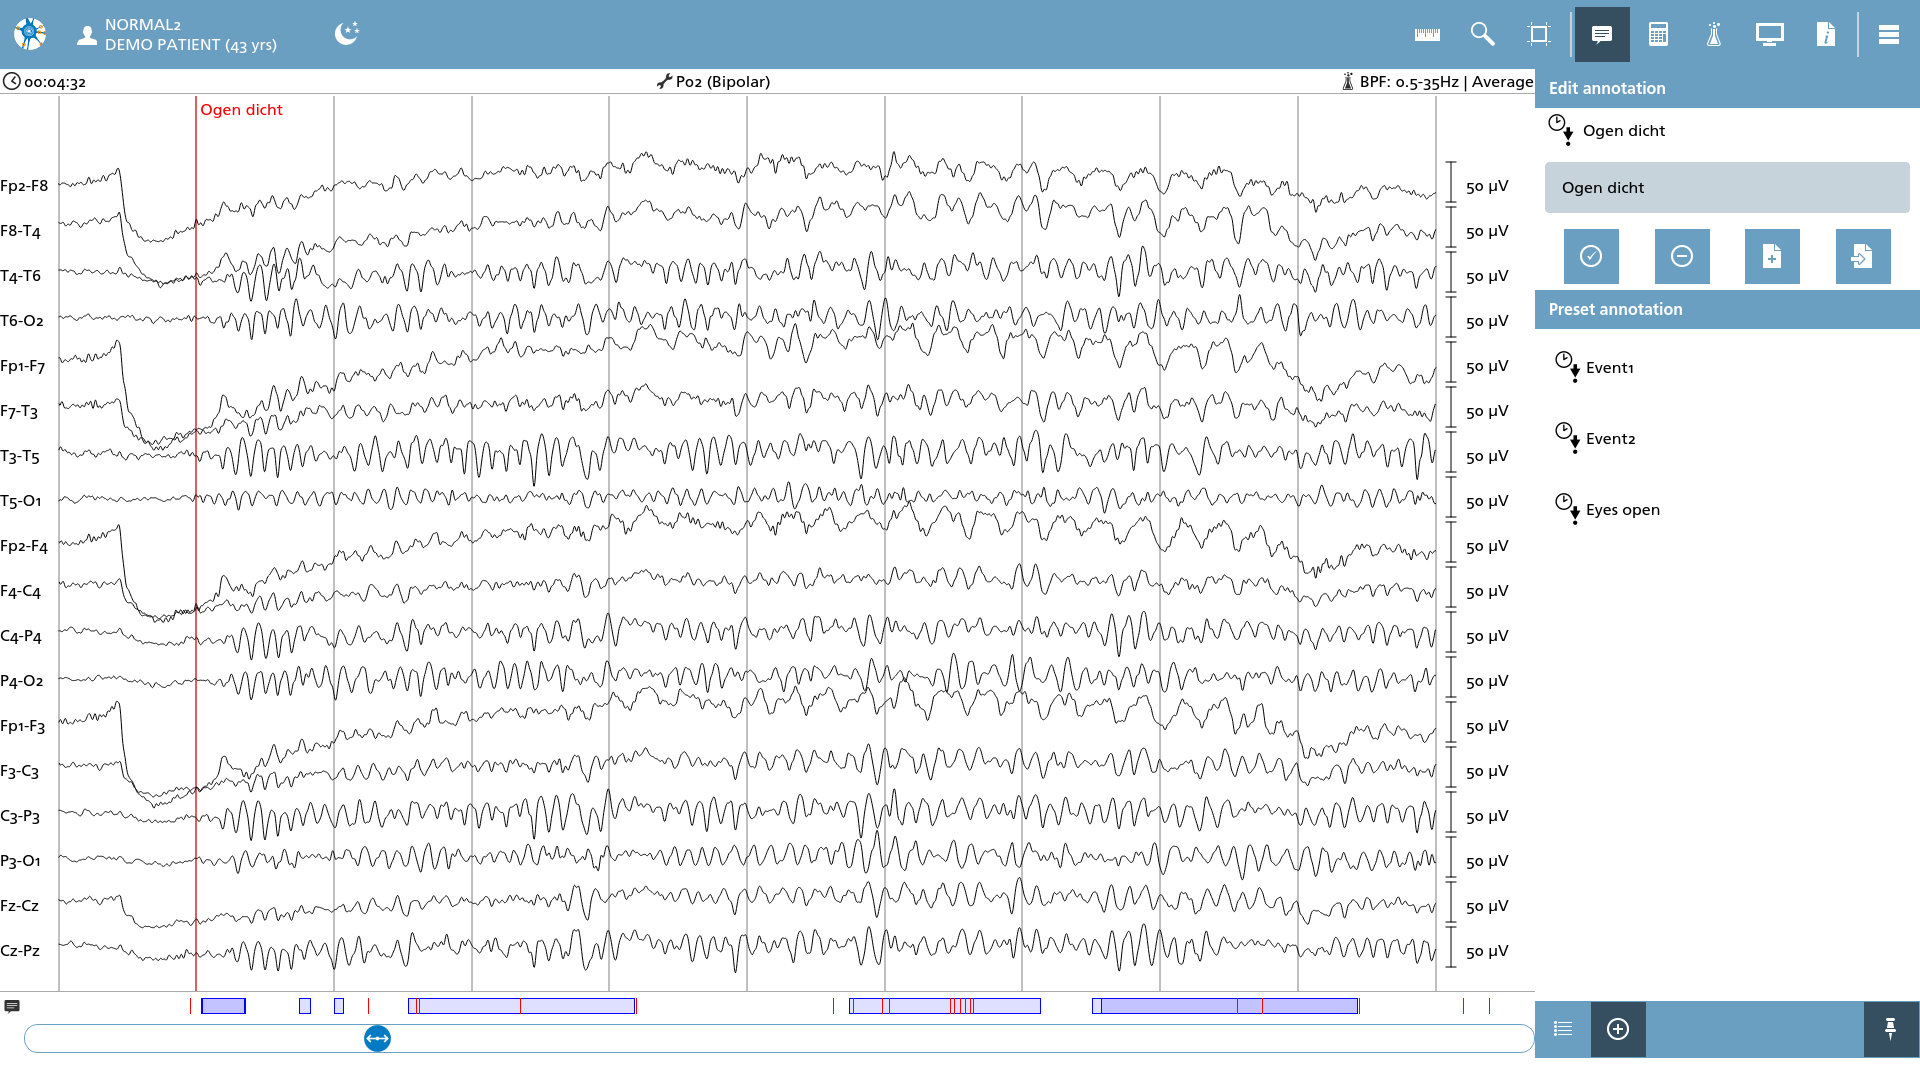
When the sub-menu for preset annotations is selected, the preset annotation list is displayed. By selecting a preset annotation, the label on the currently selected annotation (whether it is existing or new) is replaced and confirmed with the preset in a single action.
3. Overlay Sub-menu
The annotation overlay features two sub-menu modes:
-
Overview of the existing annotations (this is the default mode upon first opening)
-
List of preset annotations
Clicking on the specific action icons will bring up the desired sub-menu.
|
Icon |
Description |
|---|---|

|
Existing annotations Shows the list of existing file annotations |

|
Preset annotations Shows the list of preset annotations |
4. Annotation and label in EEG view
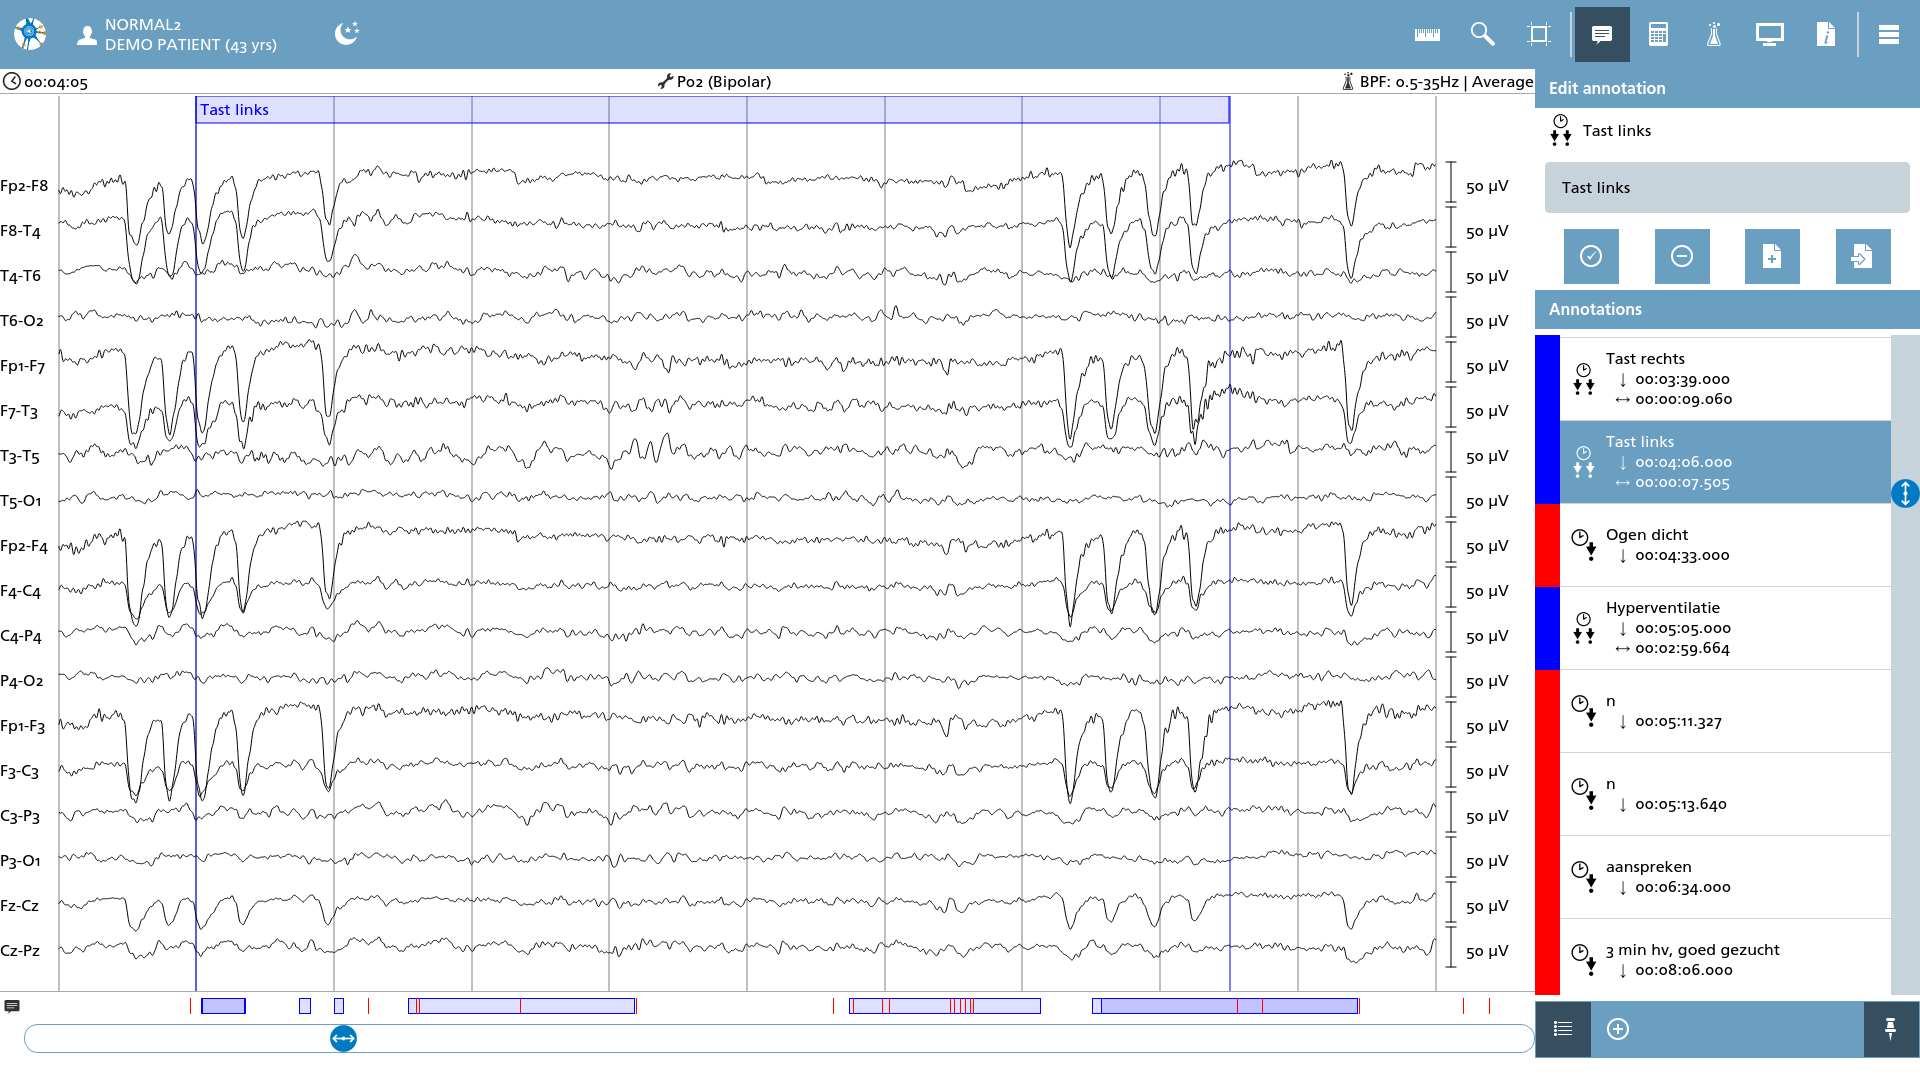
If a marker or region is visible at the current file position, its label and position are represented in the current EEG view. Markers indicate a red vertical line at the onset of the annotation, while regions exhibit two markers: one at the onset and another at the onset incremented by the duration. The label is prominently displayed above the first marker.
5. Annotation bar
The annotation bar serves as a visual representation of the markers and regions throughout the entire measurement duration. Individual markers are represented as small red lines, while regions are depicted as small blue rectangles. The navigator slider is synchronized with this bar, facilitating easy navigation into specific regions as needed.
Creating annotations
To create annotations, it is essential to utilize the selection tool. This tool can be enabled by selecting it from the action toolbar.
|
Icon |
Description |
|---|---|

|
Selection tool Enables / disables the selection tool |
Single marker
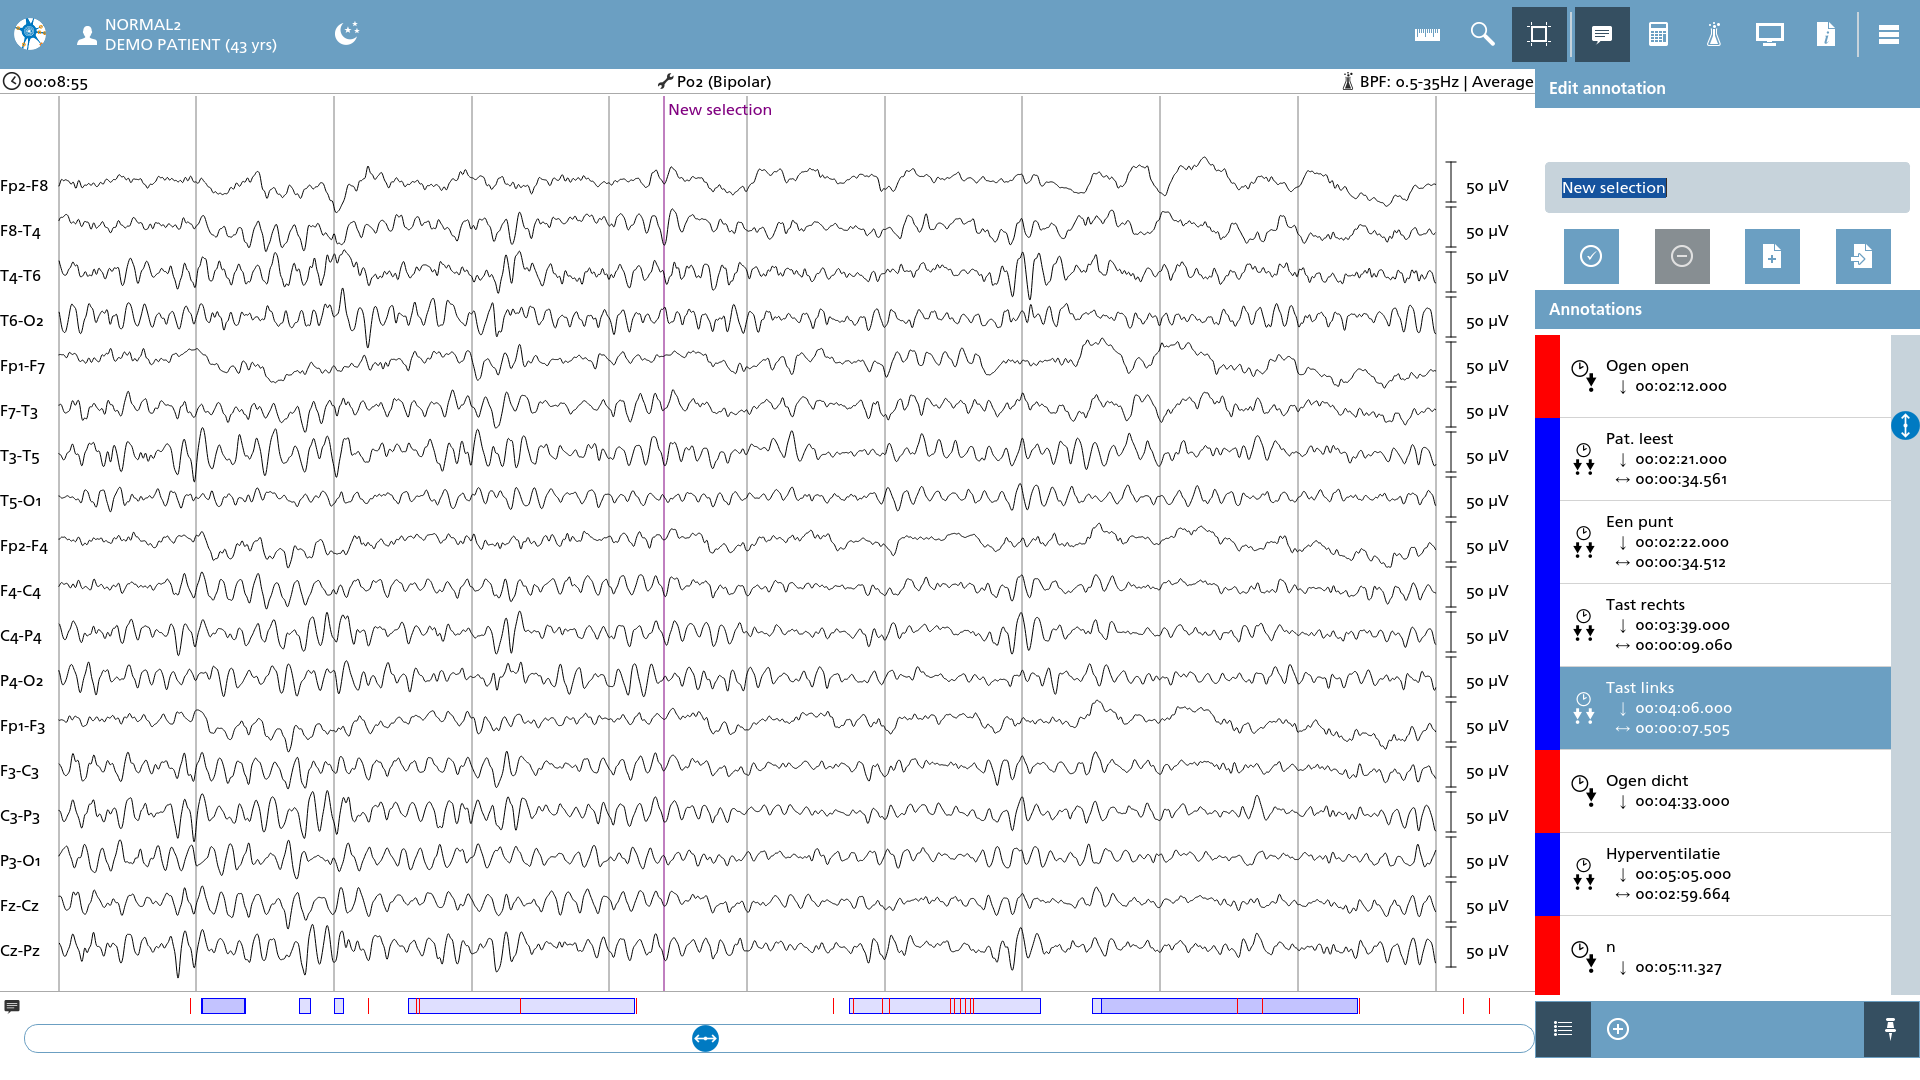
Single marker annotations can be created by selecting the desired onset and clicking or tapping once in the EEG view. After making a selection, the focus shifts to the label editor, where users can input a label for this annotation. To finalize the process, type in a new label and press ENTER or select the confirm action. The initial purple selection is subsequently transformed into a red marker, accompanied by the typed label.
Global region
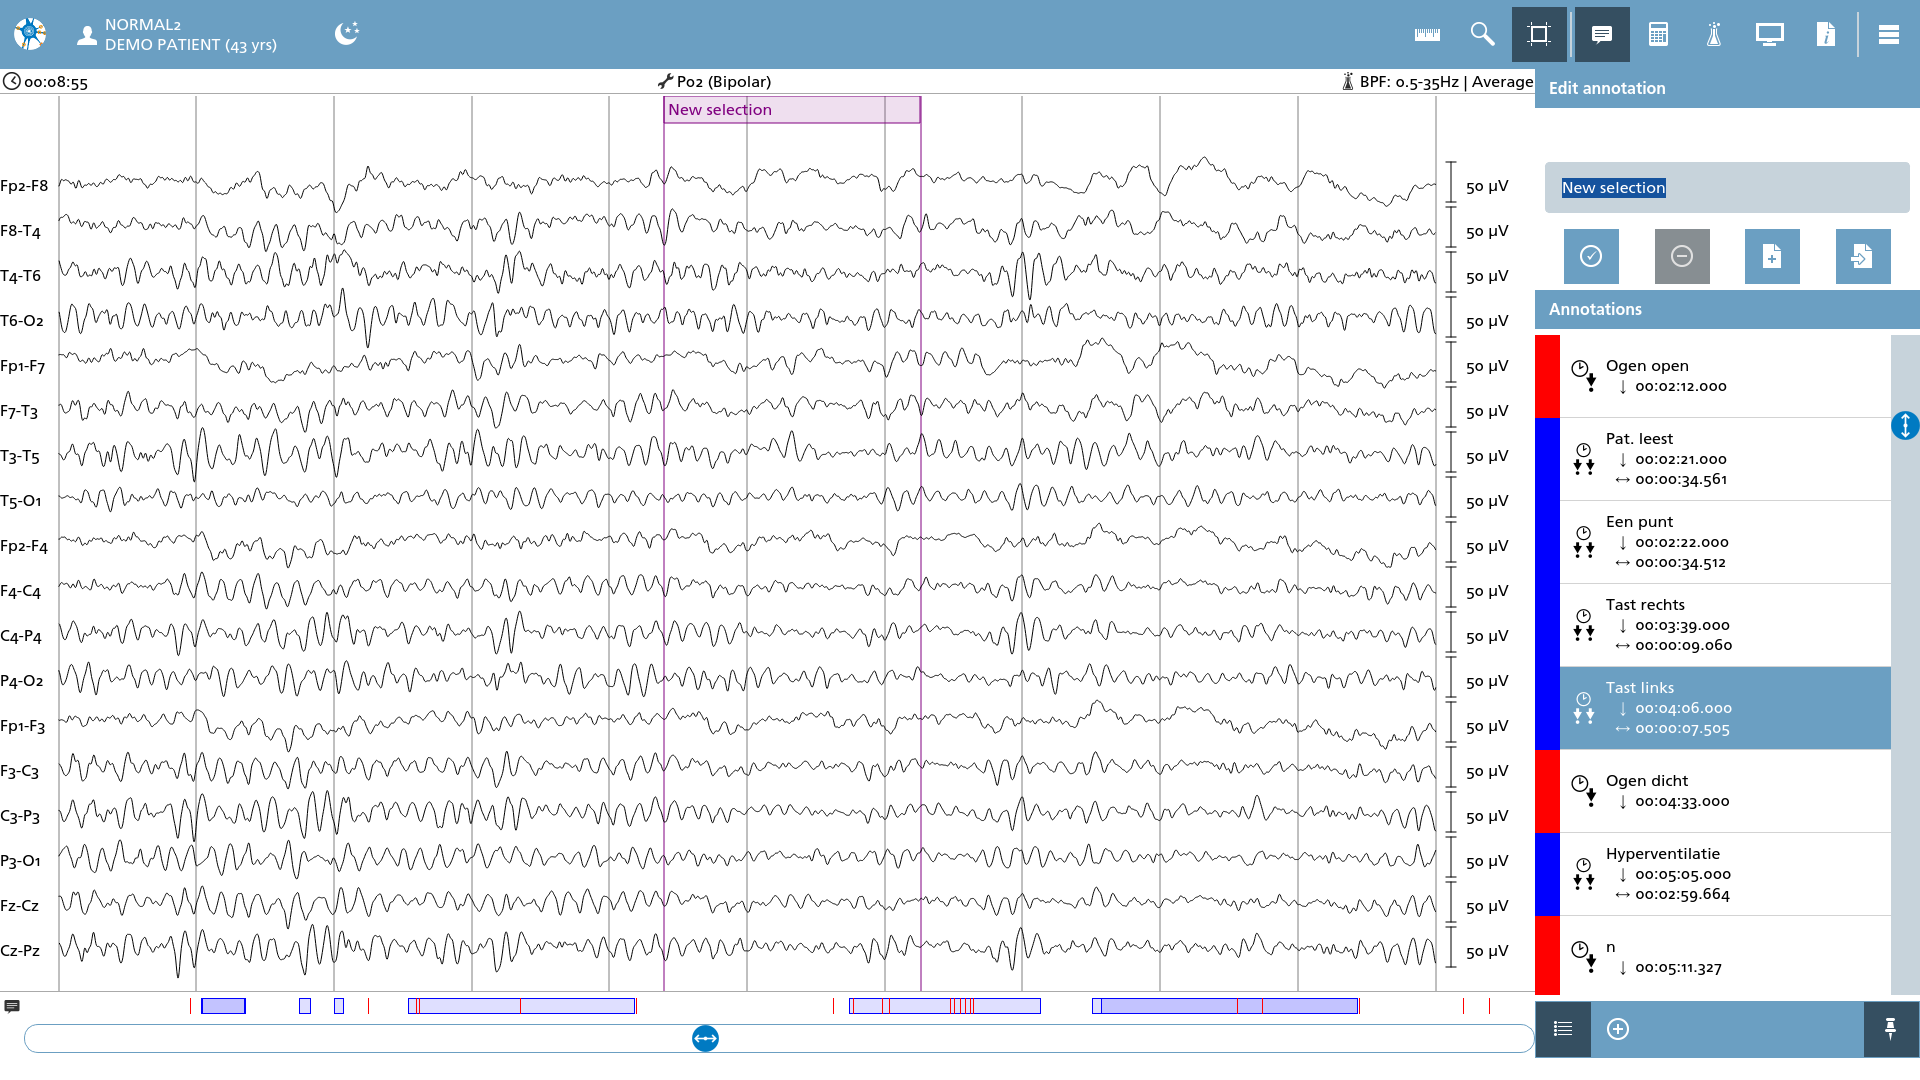
Global region annotations can be established by carefully selecting the desired onset and performing a second selection within the EEG view. The first marker indicates the beginning of the region, while the second marker signifies the end. Following the selection process, the focus shifts to the label editor, where users can input a label for this annotation. To finalize the labeling, type in a new label and either press ENTER or select the Confirm action. The initial purple selection is then transformed into a blue region, accompanied by the entered label.
Channel region
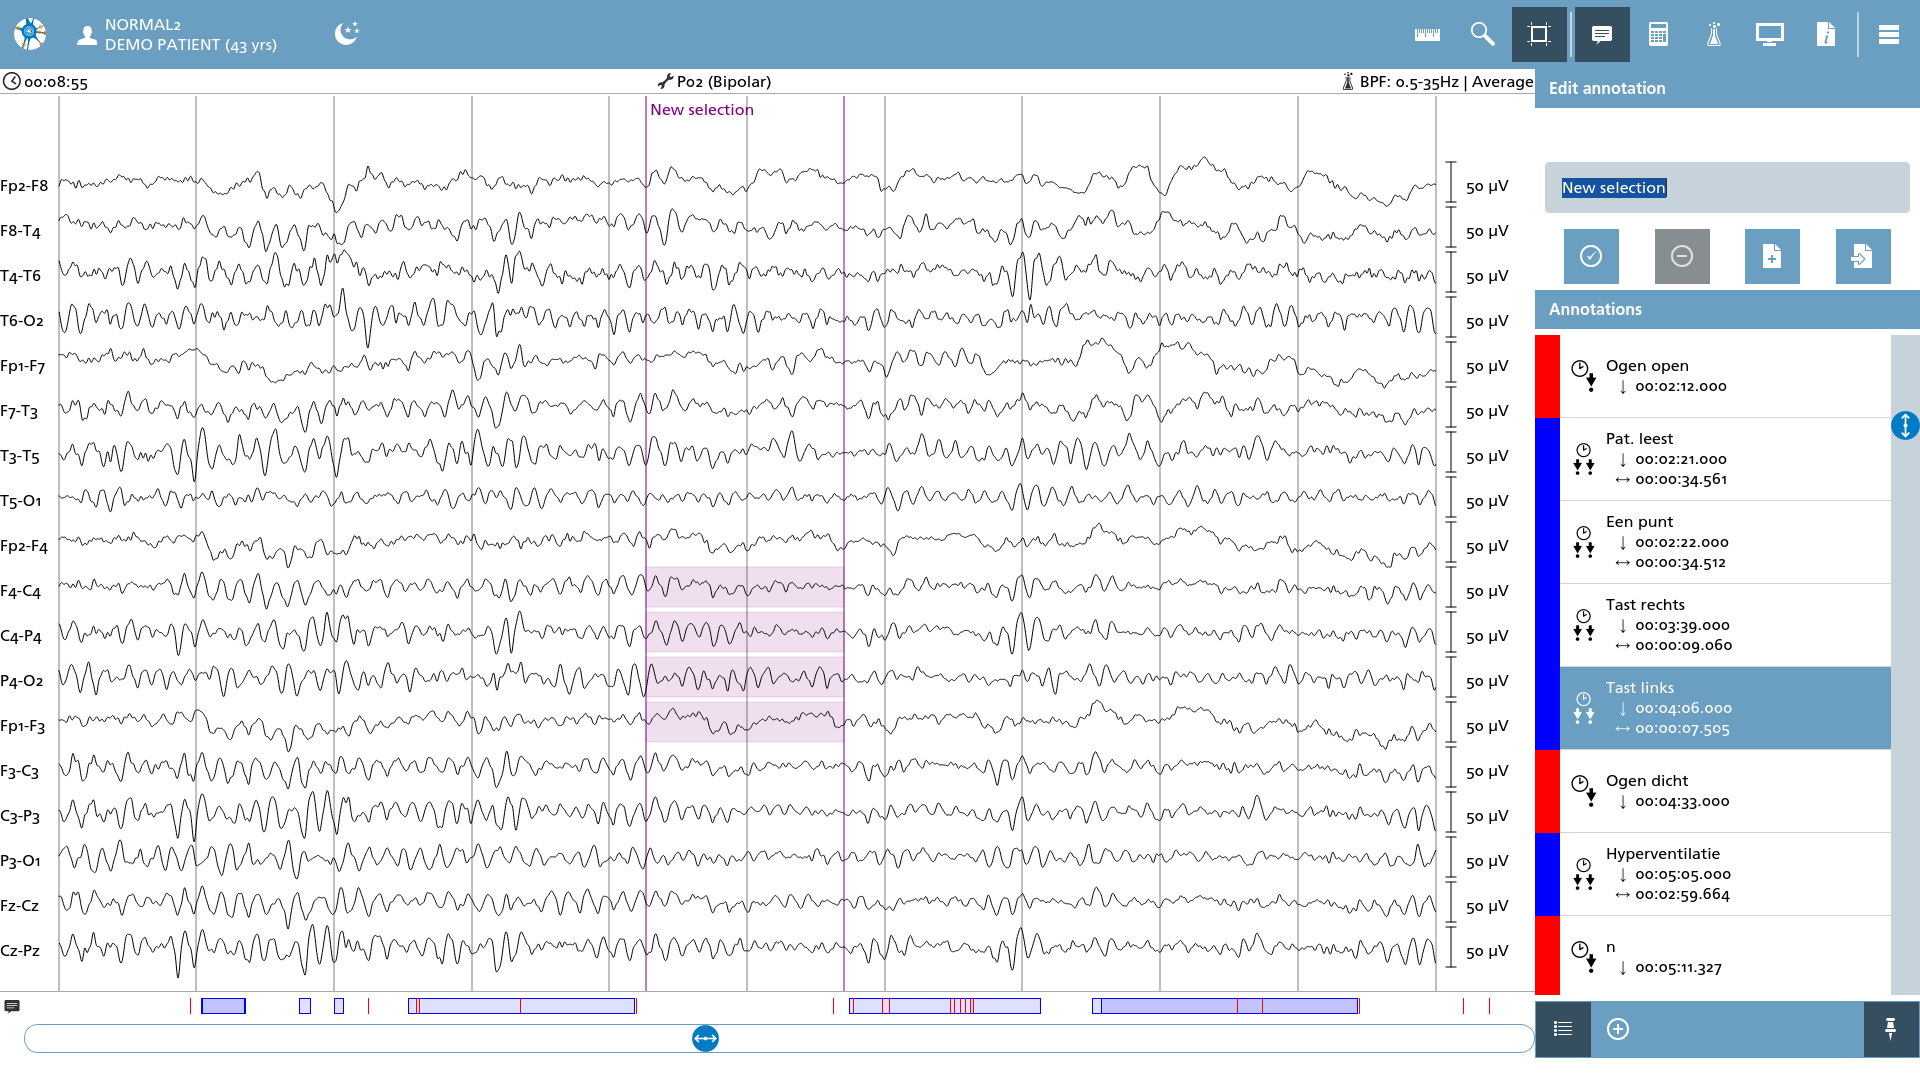
Channel region annotations can be established by dragging a rectangular region over the selected channels. The first marker indicates the beginning of the region, while the second marker signifies the end. Once the selection is made, the focus transitions to the label editor, where users can input a label for this annotation. After typing in a new label, pressing ENTER or selecting the Confirm action will finalize the entry. The initial purple selection will then be converted into a blue region, accompanied by the designated label.