
Overview
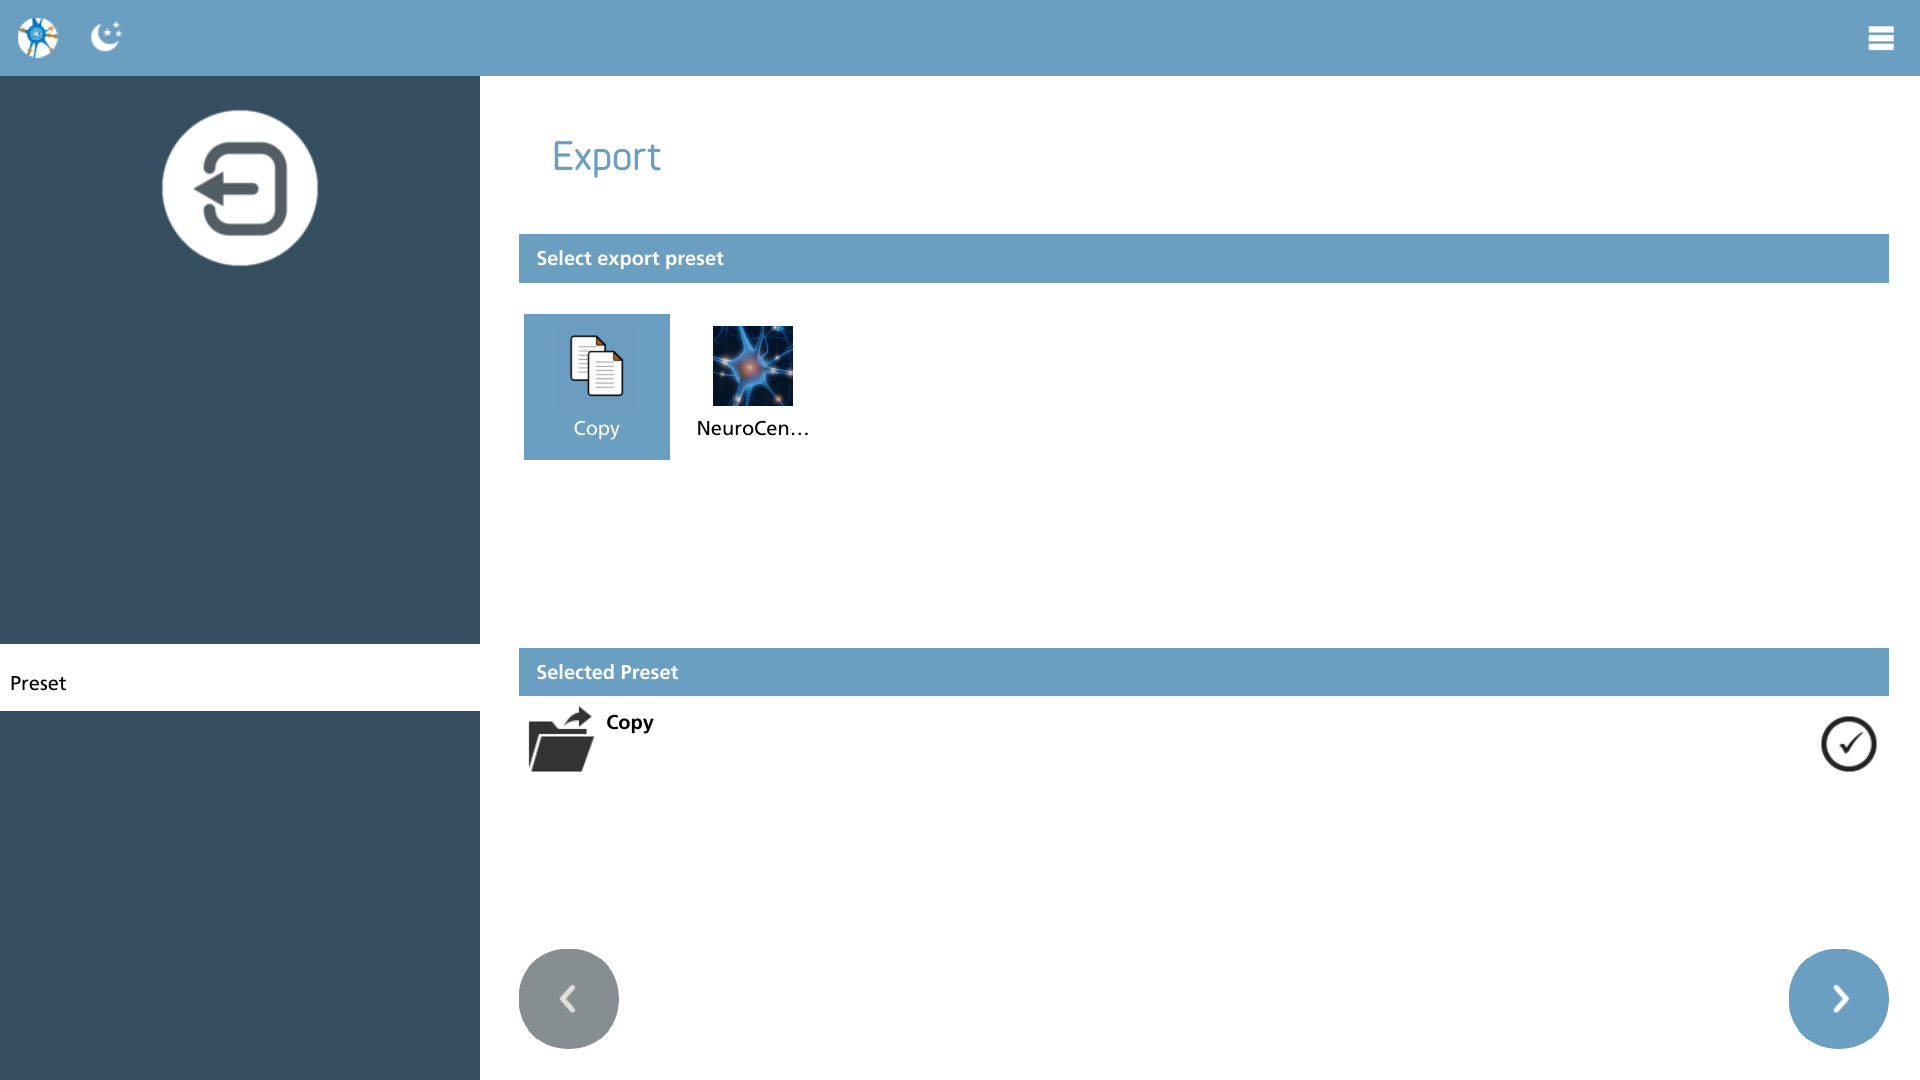
Exporting measurements involves a systematic process that consists of several steps. Upon initiating this action, the user is presented with a screen that outlines the first step. This process uses a wizard-like approach, allowing for easy navigation both backward and forward through each step.
Export preset
The initial step involves selecting the appropriate export preset, which is configured in advance. After selecting the preset and confirming that the status is indicated as OK, you may proceed to the subsequent step. In the event of an error, it will be displayed in red for easy identification.
Select measurements
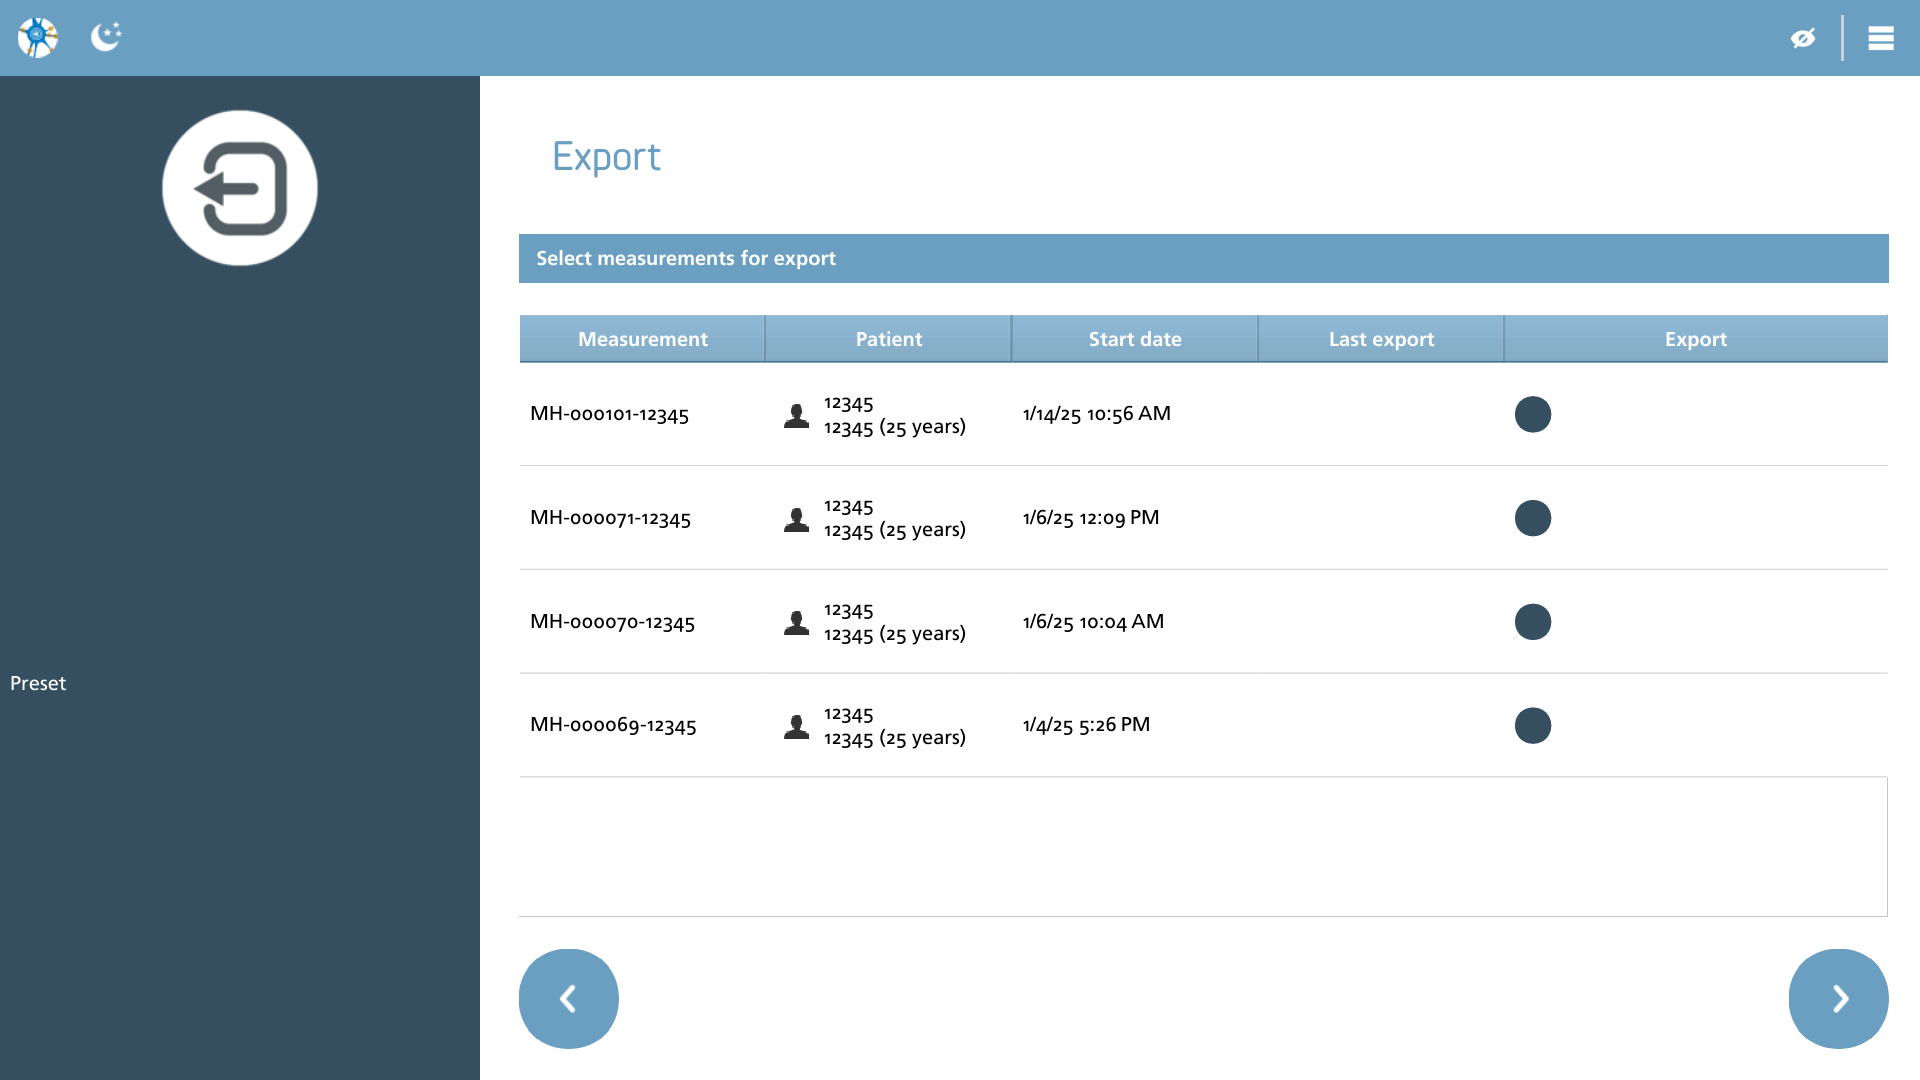
In this step, the measurements designated for export are presented. Users have the option to deselect specific measurements that they wish to exclude from the export process by clicking or tapping in the ‘Export’ column corresponding to the desired measurement.
By default, measurements that have been previously exported are not visible. To view these measurements, one must select the "display hidden" action from the action toolbar.
|
Icon |
Description |
|---|---|

|
Display hidden Displays all measurements, including those that were previously exported. |
When executing the process, the export operation is conducted.
Export
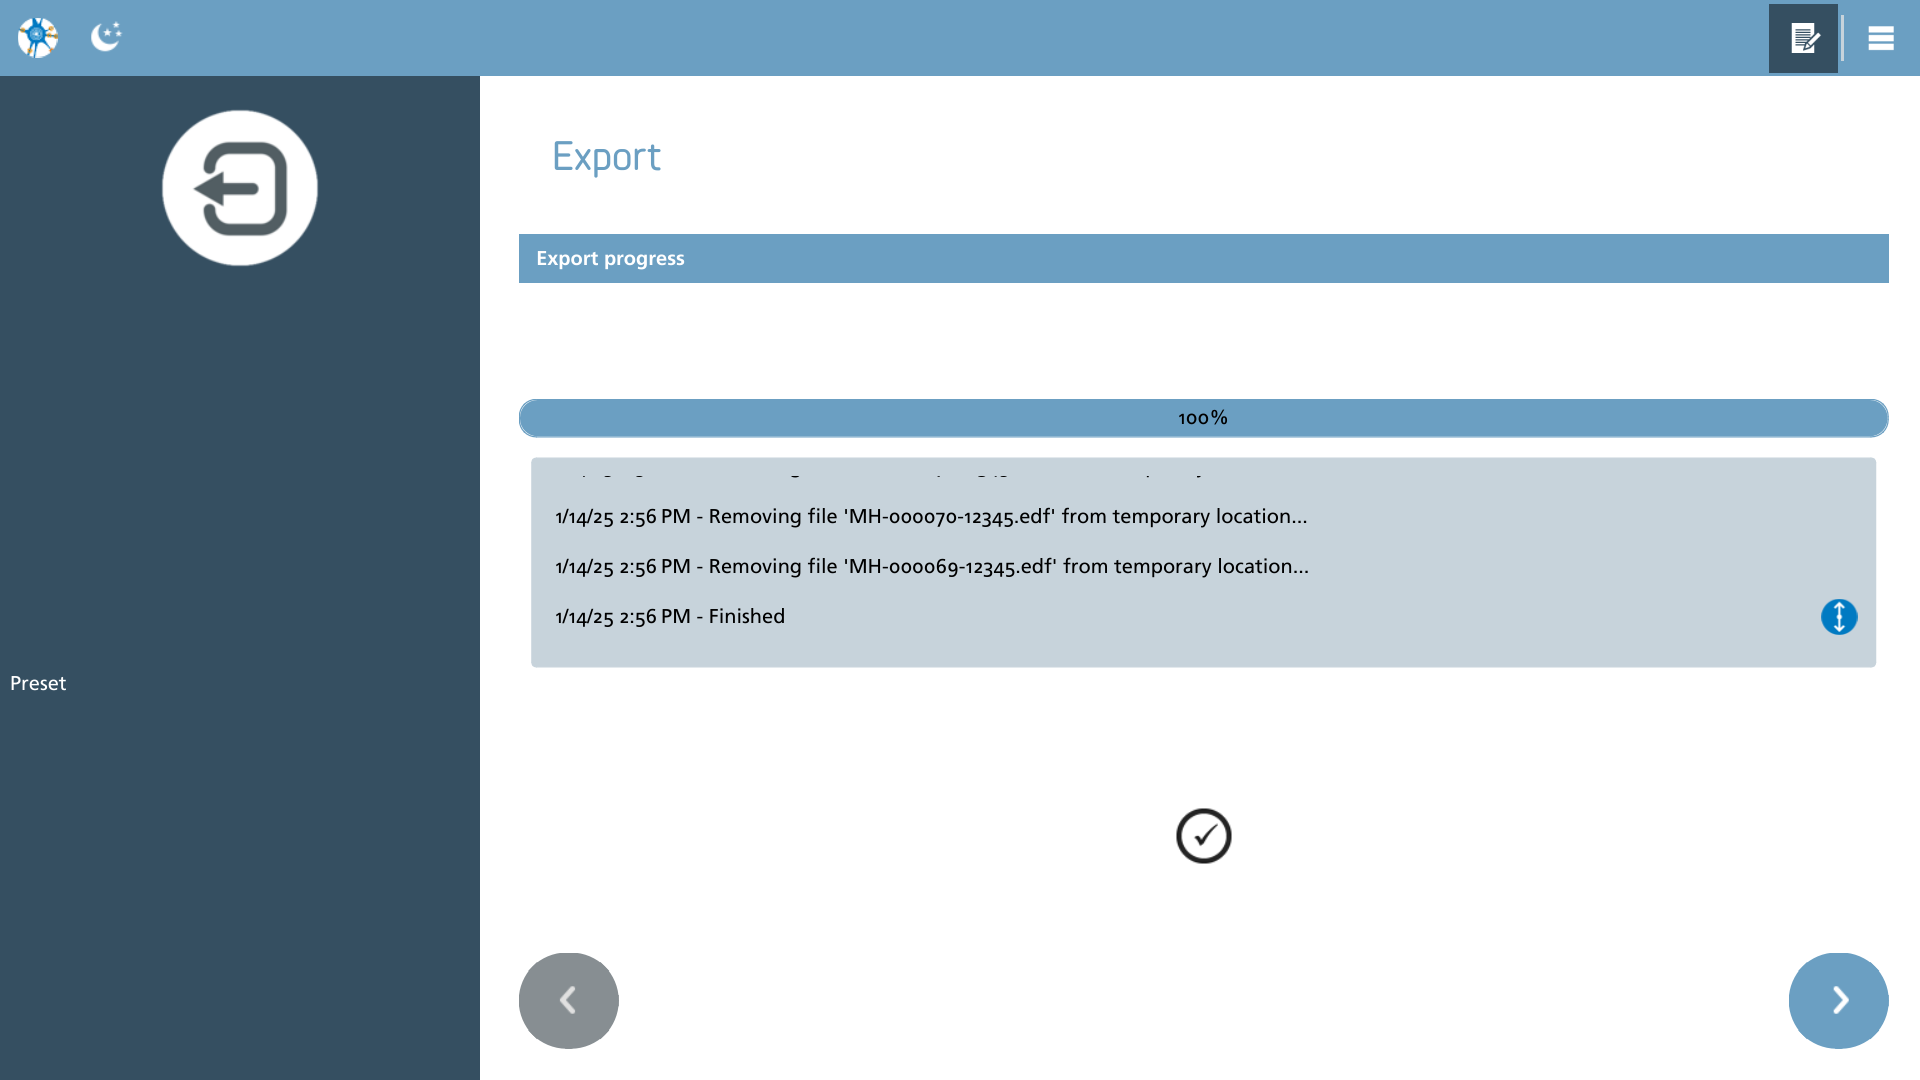
In this step, the progress and status of the export process is monitored, while also displaying a log of the export events occurring. Upon successful completion of the export, an OK icon will be visible beneath the progress indicator. By selecting the log action from the action toolbar, a detailed log of the actions being executed will be presented.
|
Icon |
Description |
|---|---|

|
Log Displays the execution log of the current export. |
When proceeding, the program returns to the home screen.