
Overview
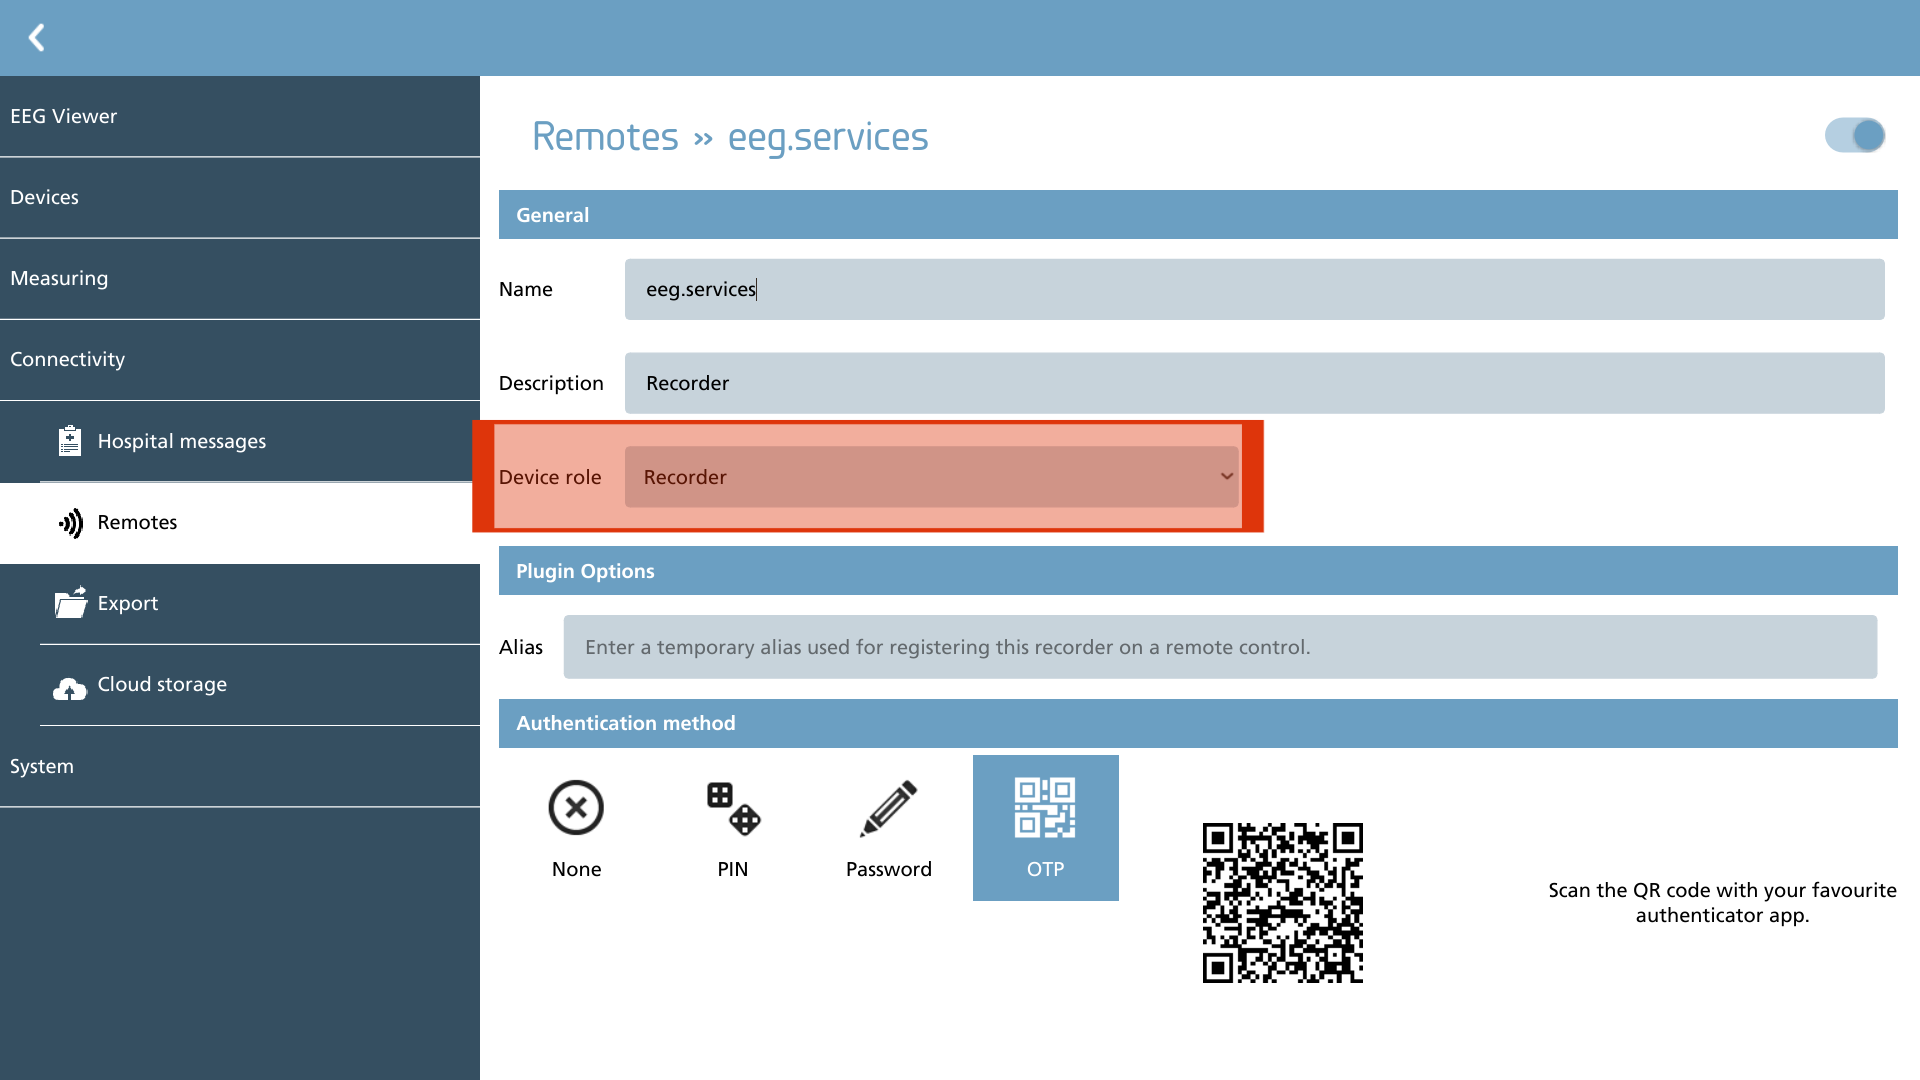
When configuring remotes, it is essential to accurately define the correct device role for the remote. The two available options are ‘Recorder’ and ‘Remote Control’. Systems designated with the recorder role are designed to be controlled by systems assigned the remote control role. Consequently, it is mandatory to set up one of each role on each system: every recorder requires at least one remote control.
Additionally, the plugin options may vary depending on the selected roles.
Plugins
The plugins delineate the available remotes. Some plugins necessitate additional configuration, while those that do not require specific configuration are not discussed further here. Below is the current set of plugins along with a brief description of each:
|
Icon |
Description |
Configurable |
|---|---|---|

|
eeg.services Cloud Support for monitoring remotes via the eeg.services Cloud |
Yes |

|
Local Network Support for monitoring remotes via a Local Area Network. |
Yes |
eeg.services Cloud
Recorder
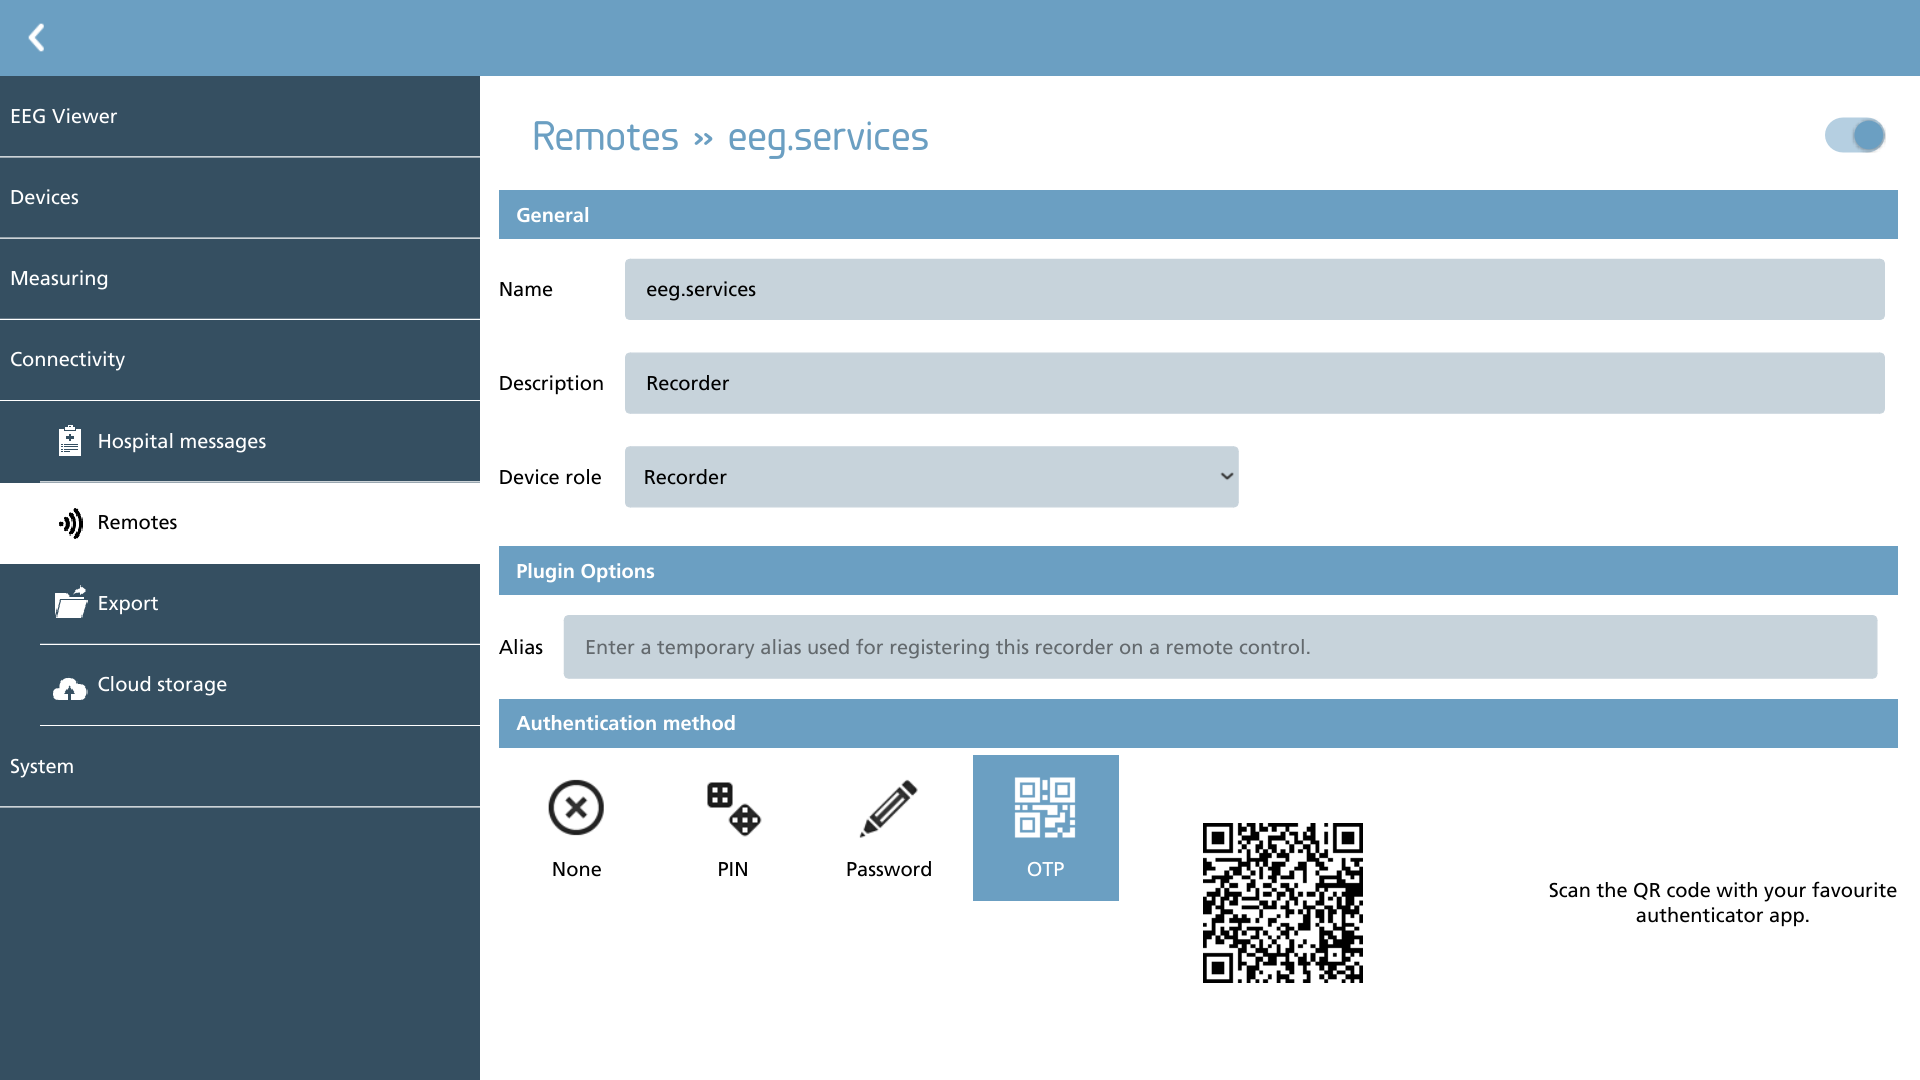
This plugin facilitates the connection of your recorder to the eeg.services Cloud platform, enabling it to be accessed remotely via the internet. The connections established are end-to-end encrypted, and when paired with a robust authentication method, they ensure secure protection of your data.
To configure the recorder, you should first establish a temporary alias and initiate a new registration. This procedure guarantees that the recorder can be easily registered from a remote control. Once the connection to the remote control is successfully established, it is important to revert the alias back to blank, as it is no longer required. In the event that you wish to register an additional remote control with this recorder, you will need to set a temporary alias once more and repeat the registration process.
Remove the temporary alias from the recorder section after the registration of all remote controls is complete. Subsequent communication between the registered remote controls and the recorder no longer requires the alias.
To safeguard the recorder instance, please select one of the following authentication methods:
|
Icon |
Description |
|---|---|

|
None No authentication method is required. However, it is important to note that this practice is not advisable. |

|
PIN To access this recorder, it is necessary to utilize a 6-digit Personal Identification Number (PIN) code. |

|
Password Utilize a password to gain access to this recording device. |

|
One-Time Password (OTP) To enhance your security, it is advisable to set up a One-Time Password (OTP) using your preferred authenticator application. This method provides an additional layer of protection for your accounts by generating a unique code for each login attempt. |
Remote control
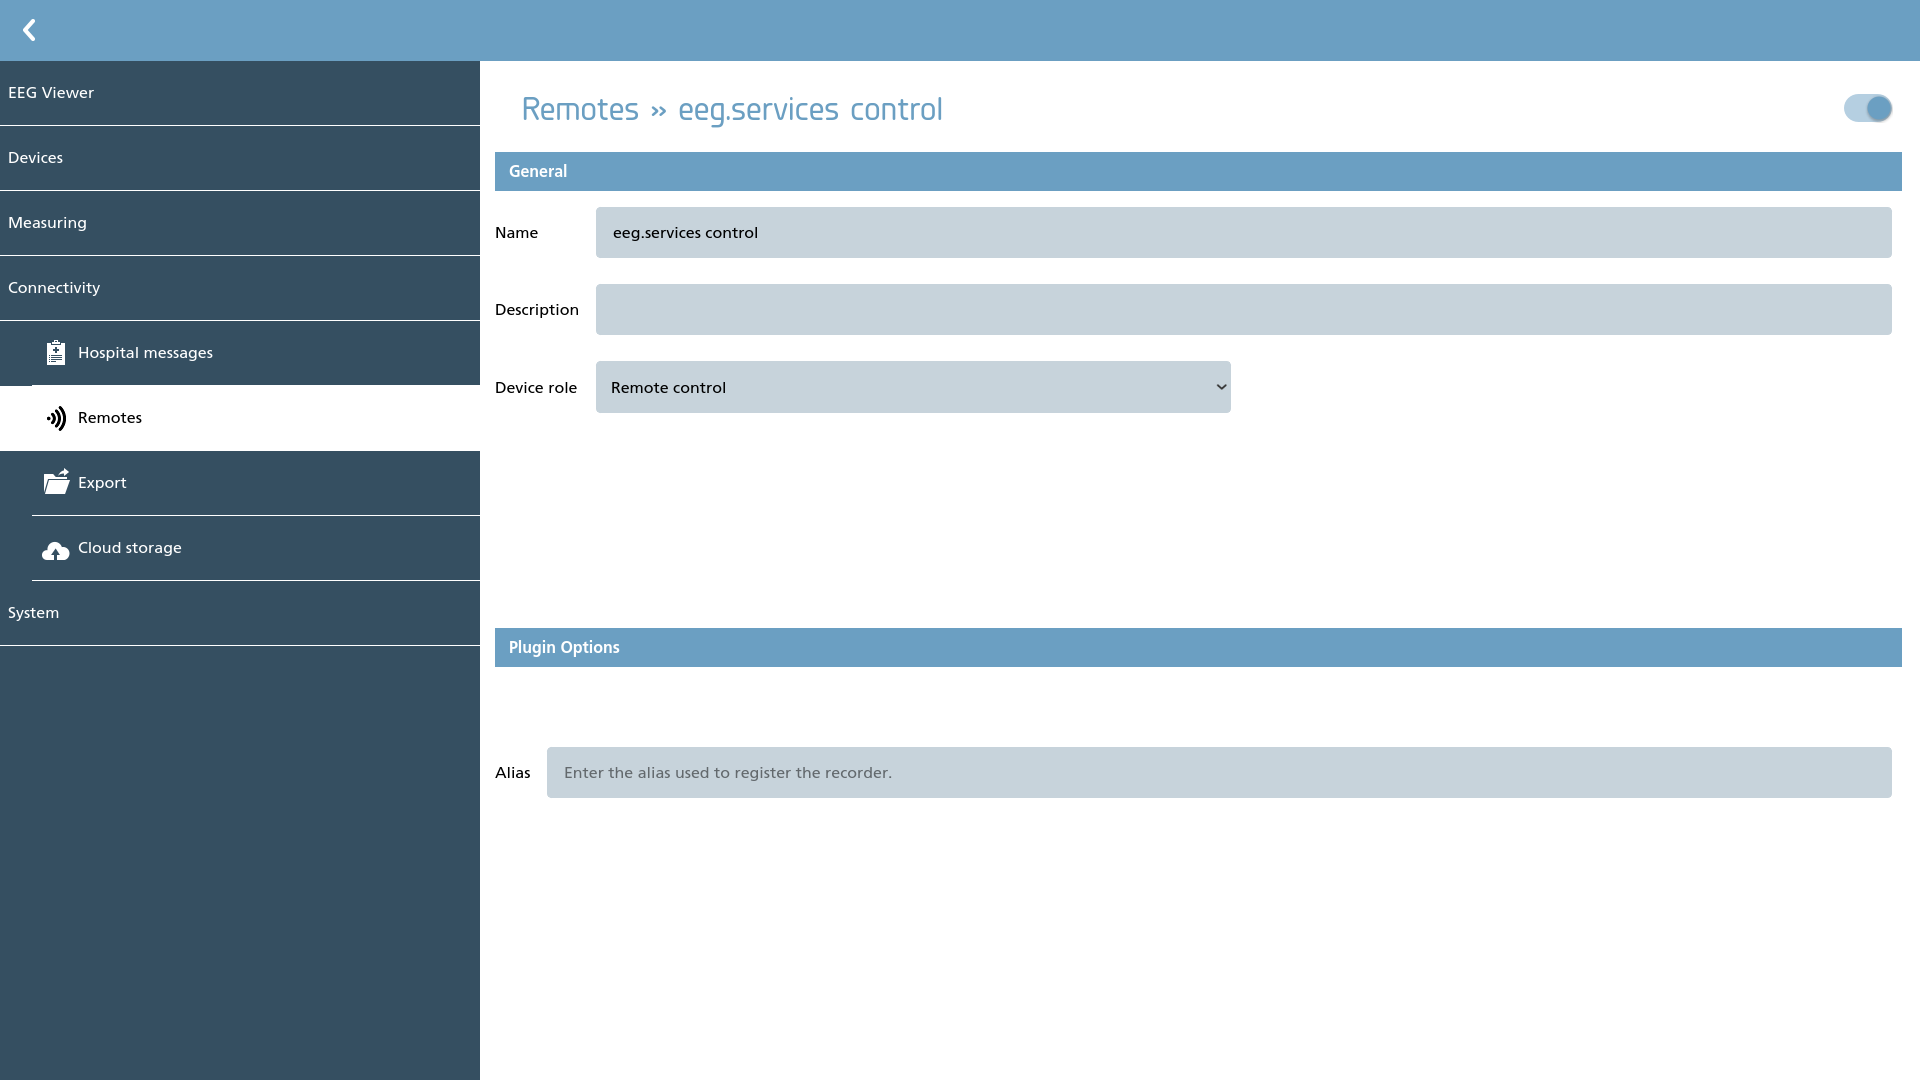
In the context of remote control functionality, the plugin is designed to operate with a temporary alias that was established during the setup of the recorder. To connect to the recorder, one simply needs to input the alias. It is important to note that this alias is automatically removed after use, whereas the recorder itself requires manual removal of its temporary alias.
Local Network
Recorder
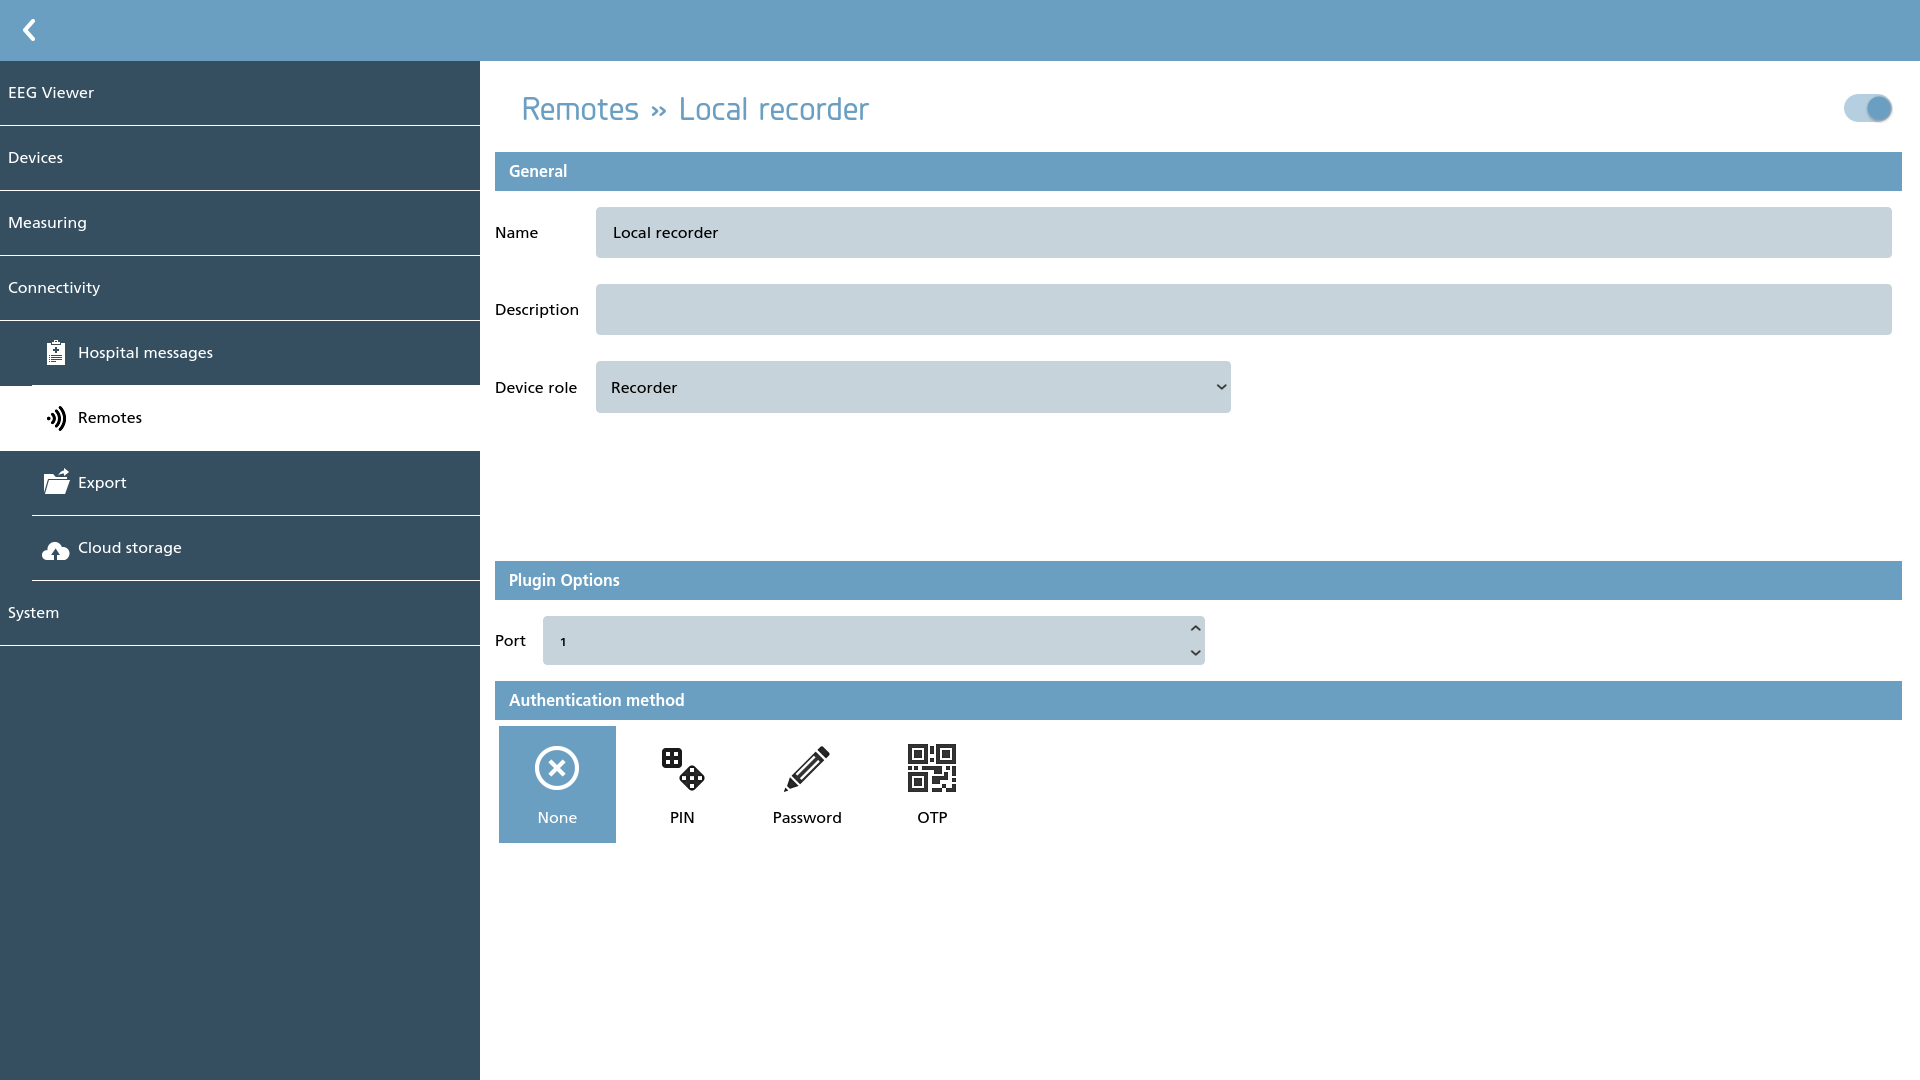
Local network access to the recorder can be configured effectively. The recorder is designed to listen on all network interfaces utilizing the port specified within the plugin options.
It is essential to verify your local firewall settings when configuring a port. In many cases, additional configuration may be necessary to permit traffic on the specified port.
To safeguard the recorder instance, please select one of the following authentication methods:
|
Icon |
Description |
|---|---|
|
|
None No authentication method is required. However, it is important to note that this practice is not advisable. |
|
|
PIN To access this recorder, it is necessary to utilize a 6-digit Personal Identification Number (PIN) code. |
|
|
Password Utilize a password to gain access to this recording device. |
|
|
One-Time Password (OTP) To enhance your security, it is advisable to set up a One-Time Password (OTP) using your preferred authenticator application. This method provides an additional layer of protection for your accounts by generating a unique code for each login attempt. |
Remote control
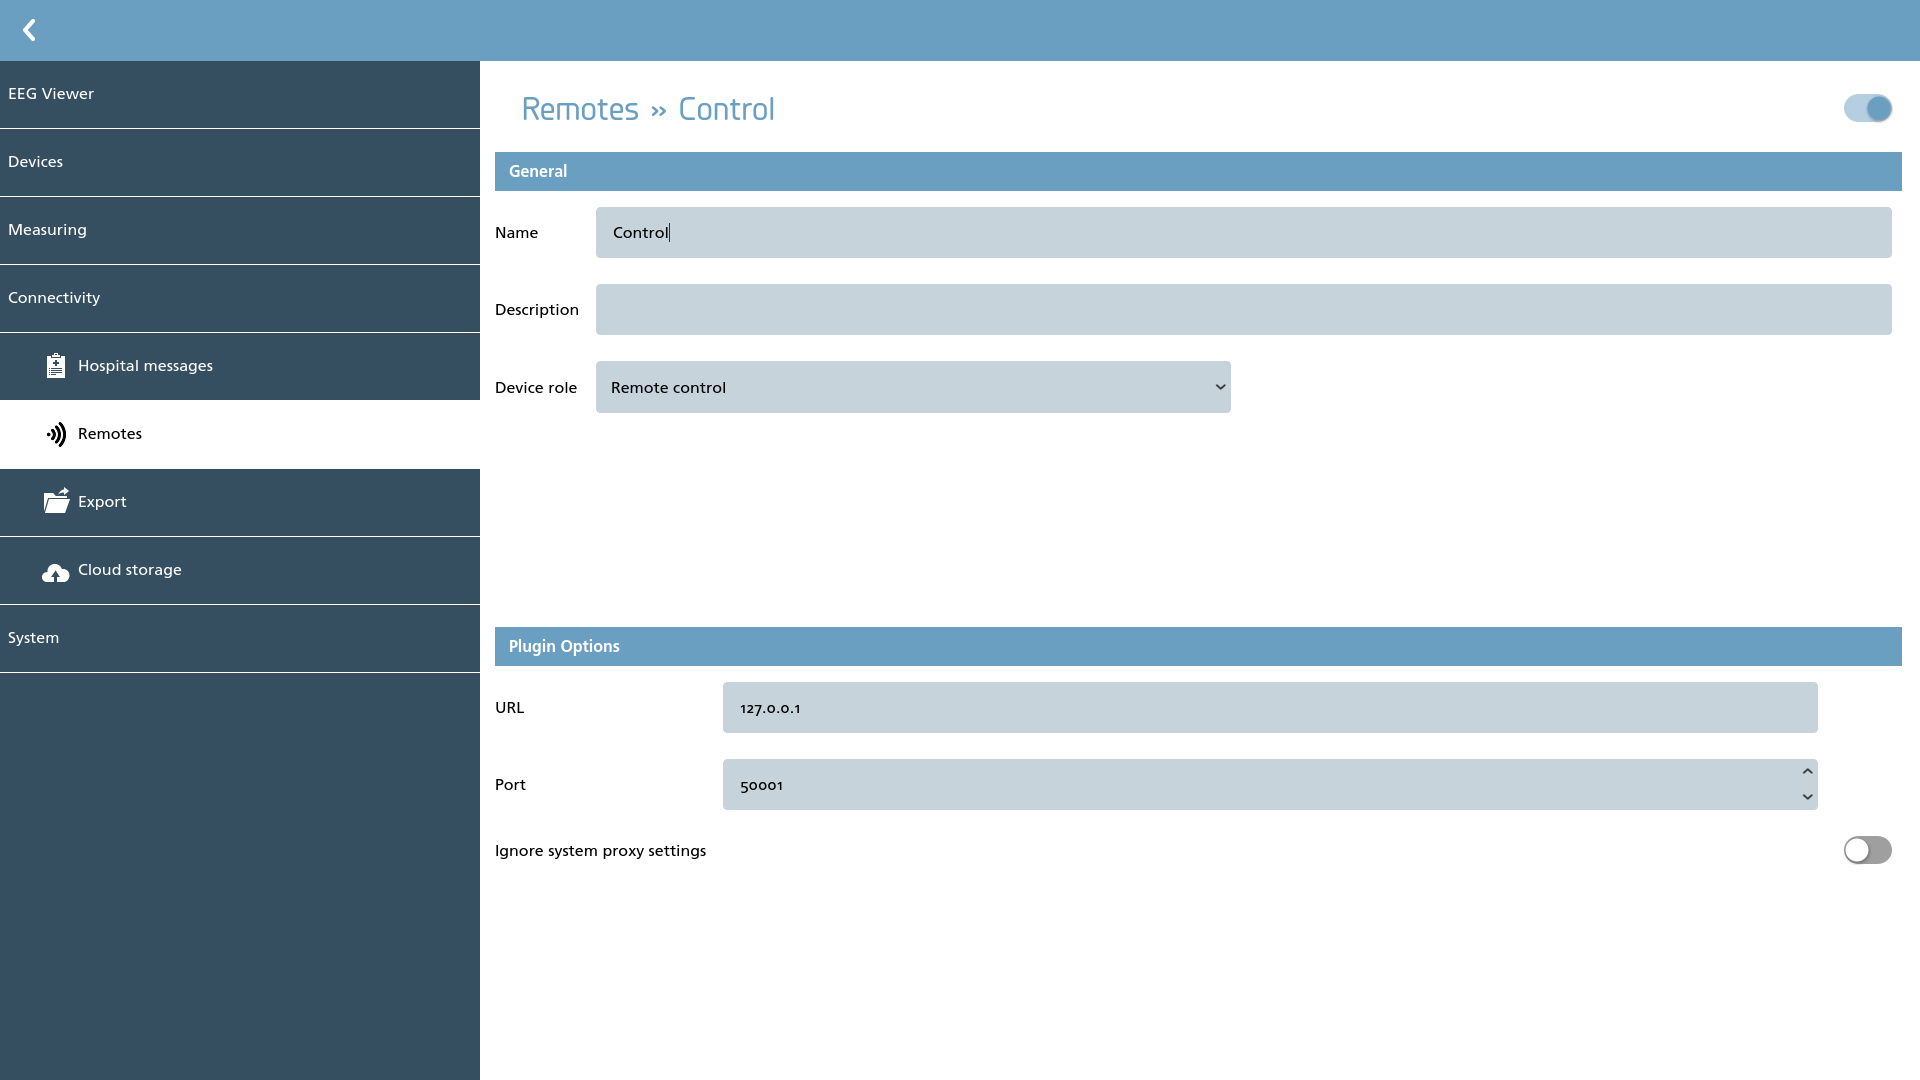
The remote control options can be configured in this section. It is important to note that the URL must specify either the DNS location or an IP address, as the scheme will be selected automatically. Additionally, the port specified should correspond to the port configured in the recorder settings.
If you experience challenges in establishing a connection to local infrastructure while utilizing a system-wide proxy server, it is recommended to adjust the setting by toggling the switch labeled ‘Ignore system proxy settings’.